TJ-56-428 4-Digit Digital DIY Clock
Following are an English translation of the instructions for the TJ-56-428 4-Digit Digital DIY Clock.
You can purchase this kit from AliExpress: TJ-56-428 4-Digit Digital DIY Clock Kits with Acrylic Shell, DIY Alarm Clock Soldering Practice Kit for Learning Electronics.
You can read more on my blog or watch the assembly video on YouTube.
- 1. Function introduction
- 2. Components list
- 3. Instructions for use
- 4. Circuit diagram
- 5. Documentation scans
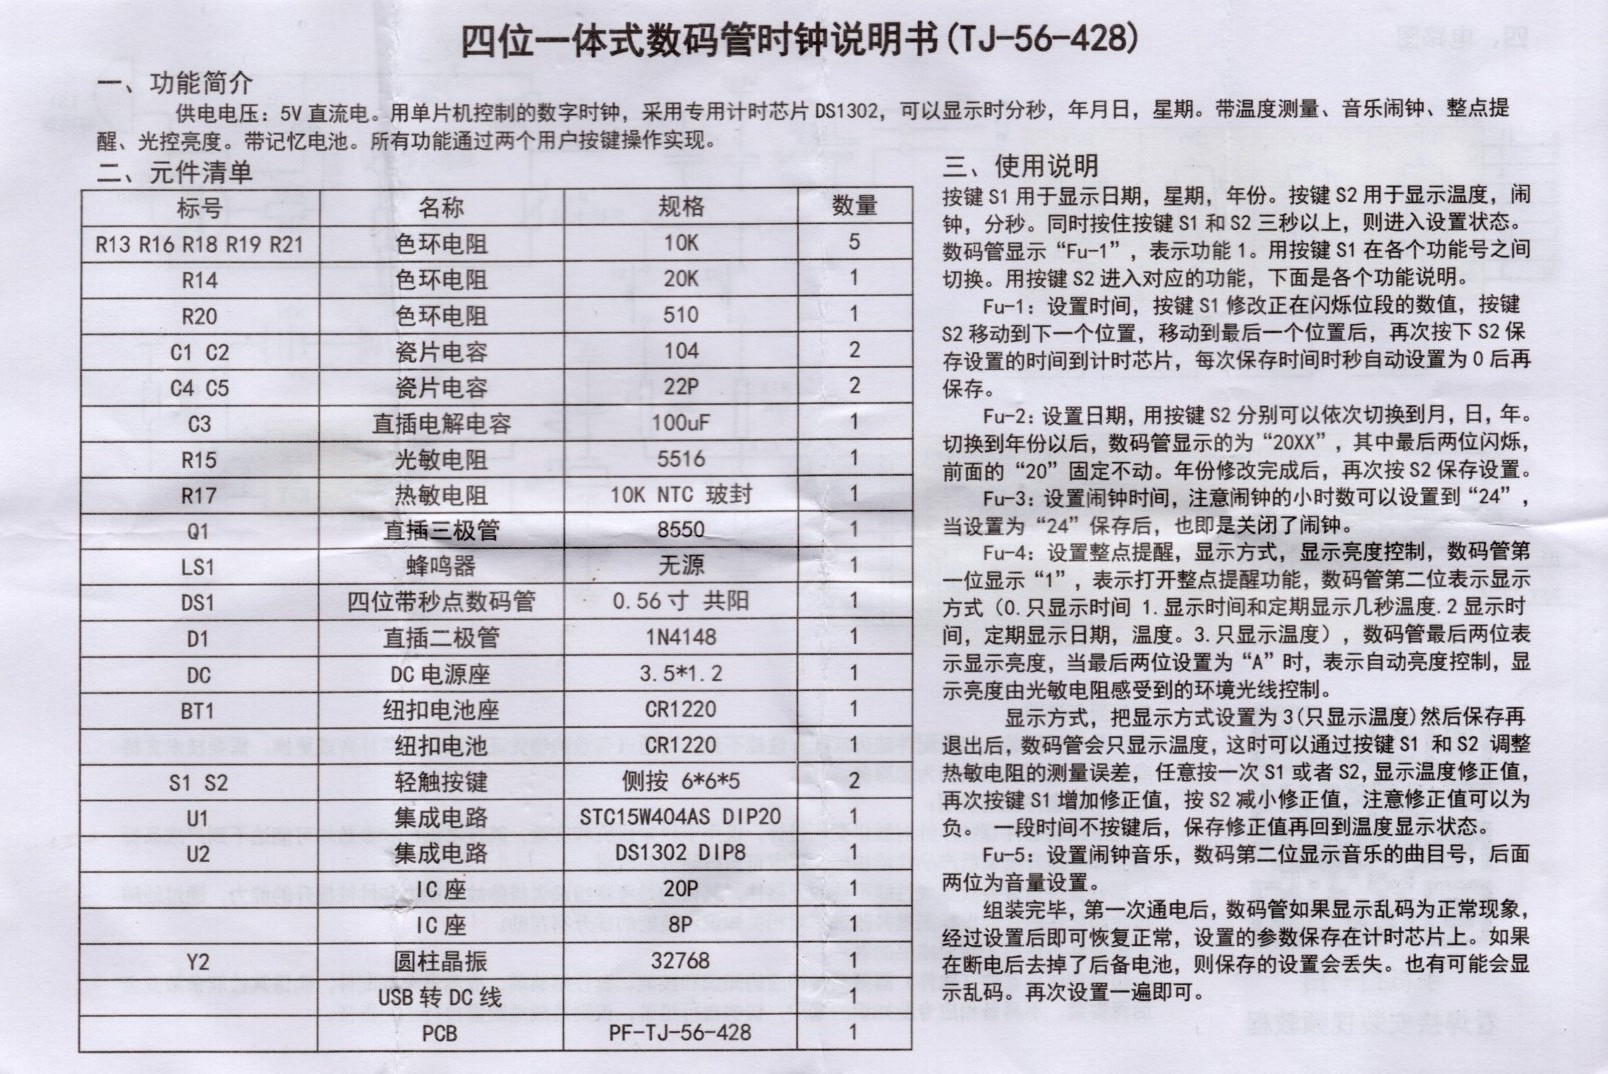
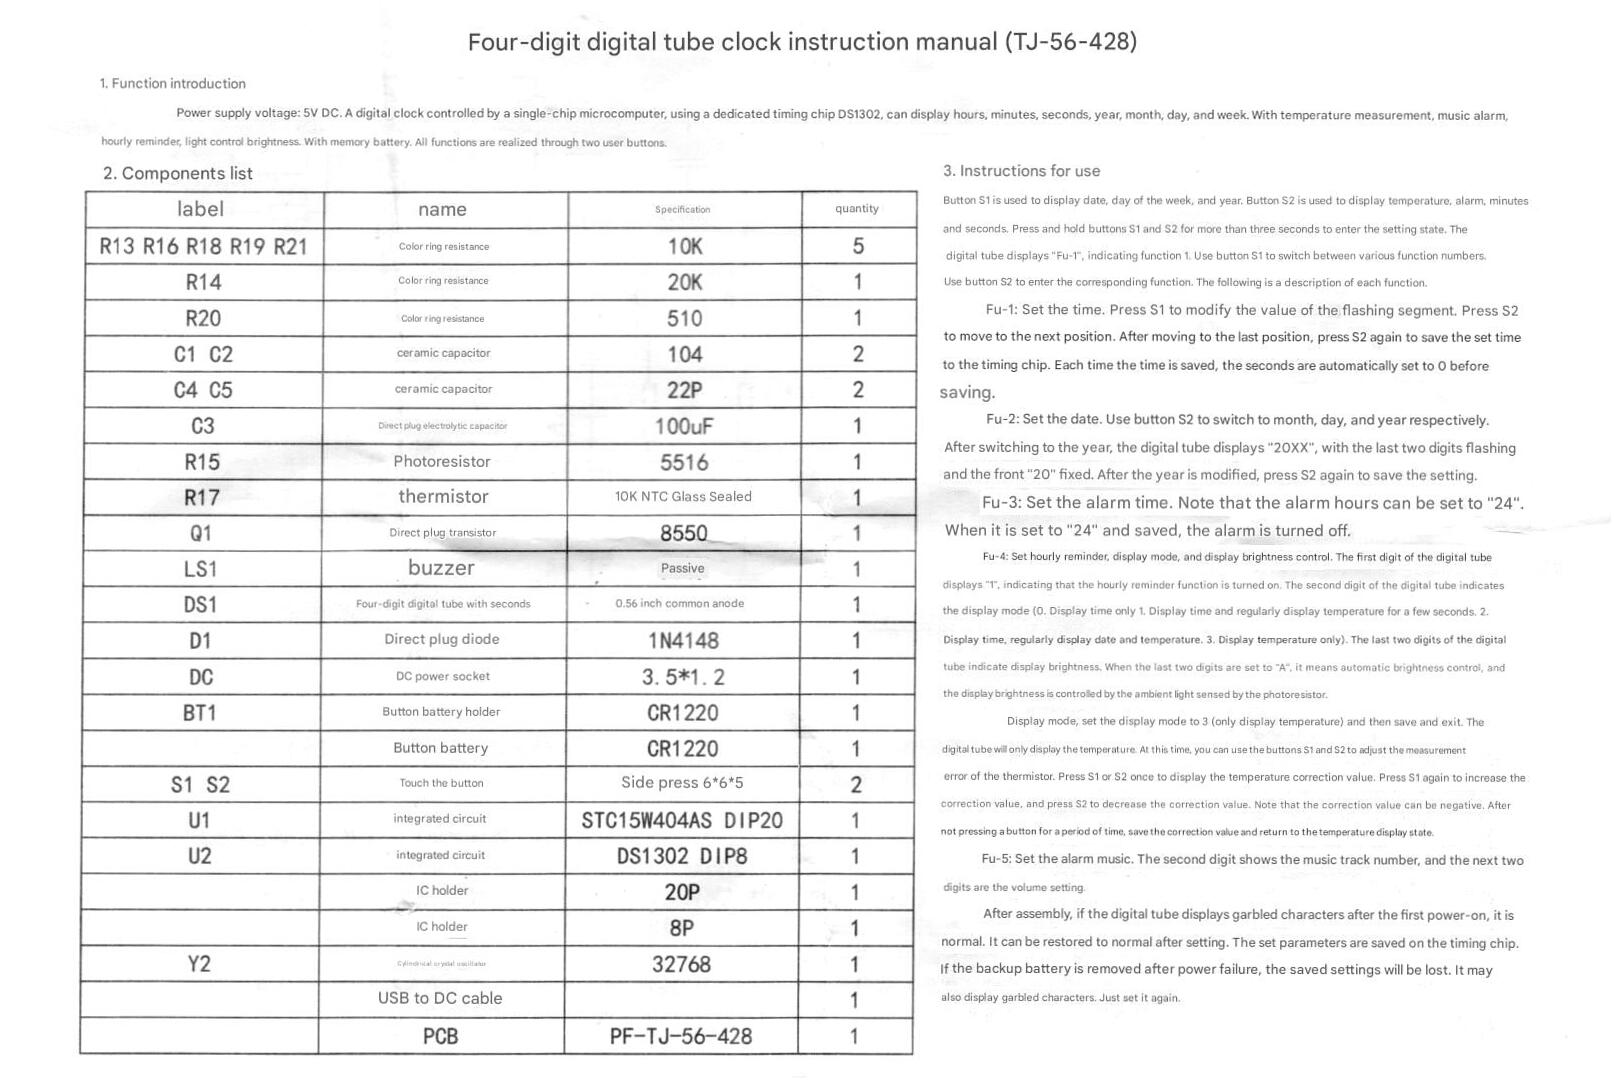
1. Function introduction
Four-digit digital tube clock instruction manual (TJ-56-428)
Power supply voltage: 5V DC. Digital clock controlled by single chip microcomputer, using special timing chip DS1302, can display hours, minutes, seconds, year, month, day, week. With temperature measurement, music alarm, hourly reminder, light control brightness. With memory battery. All functions are realized by two user buttons.
2. Components list
| Label | Name | Specification | Quantity |
|---|---|---|---|
| R13 R16 R18 R19 R21 | Color ring resistance | 10K | 5 |
| R14 | Color ring resistance | 20K | 1 |
| R20 | Color ring resistance | 510 | 1 |
| C1 C2 | ceramic capacitor | 104 | 2 |
| C4 C5 | ceramic capacitor | 22P | 2 |
| C3 | Direct plug electrolytic capacitor | 100uF | 1 |
| R15 | Photoresistor | 5516 | 1 |
| R17 | thermistor | 10K NTC Glass Sealed | 1 |
| Q1 | Direct plug transistor | 8550 | 1 |
| LS1 | buzzer | Passive | 1 |
| DS1 | Four-digit digital tube with seconds | 0.56 inch common anode | 1 |
| D1 | Direct plug diode | 1N4148 | 1 |
| DC | DC power socket | 3.5*1.2 | 1 |
| BT1 | Button battery holder | CR1220 | 1 |
| Button battery | CR1220 | 1 | |
| S1 S2 | Touch the button | Side press 6*6*5 | 2 |
| U1 | integrated circuit | STC15W404AS DIP20 | 1 |
| U2 | integrated circuit | DS1302 DIP8 | 1 |
| IC holder | 20P | 1 | |
| IC holder | 8P | 1 | |
| Y2 | Cylindrical crystal oscillator | 32768 | 1 |
| USB to DC cable | 1 | ||
| PCB | PF-TJ-56-428 | 1 |
3. Instructions for use
Button S1 is used to display date, day of the week, and year. Button S2 is used to display temperature, alarm, minutes and seconds. Press and hold buttons S1 and S2 for more than three seconds to enter the setting state. The digital tube displays "Fu-1", indicating function 1. Use button S1 to switch between various function numbers. Use button S2 to enter the corresponding function. The following is a description of each function.
- Fu-1: Set the time.
-
Press S1 to modify the value of the flashing segment. Press S2 to move to the next position. After moving to the last position, press S2 again to save the set time to the timing chip. Each time the time is saved, the seconds are automatically set to 0 before saving.
- Fu-2: Set the date.
-
Use button S2 to switch to month, day, and year respectively. After switching to the year, the digital tube displays "20XX", with the last two digits flashing and the front "20" fixed. After the year is modified, press S2 again to save the setting.
- Fu-3: Set the alarm time.
-
Note that the alarm hours can be set to "24". When it is set to "24" and saved, the alarm is turned off.
- Fu-4: Set hourly reminder, display mode, and display brightness control.
-
The first digit of the digital tube displays "1", indicating that the hourly reminder function is turned on. The second digit of the digital tube indicates the display mode:
- Display time only
- Display time and regularly display temperature for a few seconds
- Display time, regularly display date and temperature
- Display temperature only
The last two digits of the digital tube indicate display brightness. When the last two digits are set to "A", it means automatic brightness control, and the display brightness is controlled by the ambient light sensed by the photoresistor.
Display mode, set the display mode to 3 (only display temperature) and then save and exit. The digital tube will only display the temperature. At this time, you can use the buttons S1 and S2 to adjust the measurement error of the thermistor. Press S1 or S2 once to display the temperature correction value. Press S1 again to increase the correction value, and press S2 to decrease the correction value. Note that the correction value can be negative. After not pressing a button for a period of time, save the correction value and return to the temperature display state.
- Fu-5: Set the alarm music.
-
The second digit shows the music track number, and the next two digits are the volume setting.
After assembly, if the digital tube displays garbled characters after the first power-on, it is normal. It can be restored to normal after setting. The set parameters are saved on the timing chip. If the backup battery is removed after power failure, the saved settings will be lost. It may also display garbled characters. Just set it again.
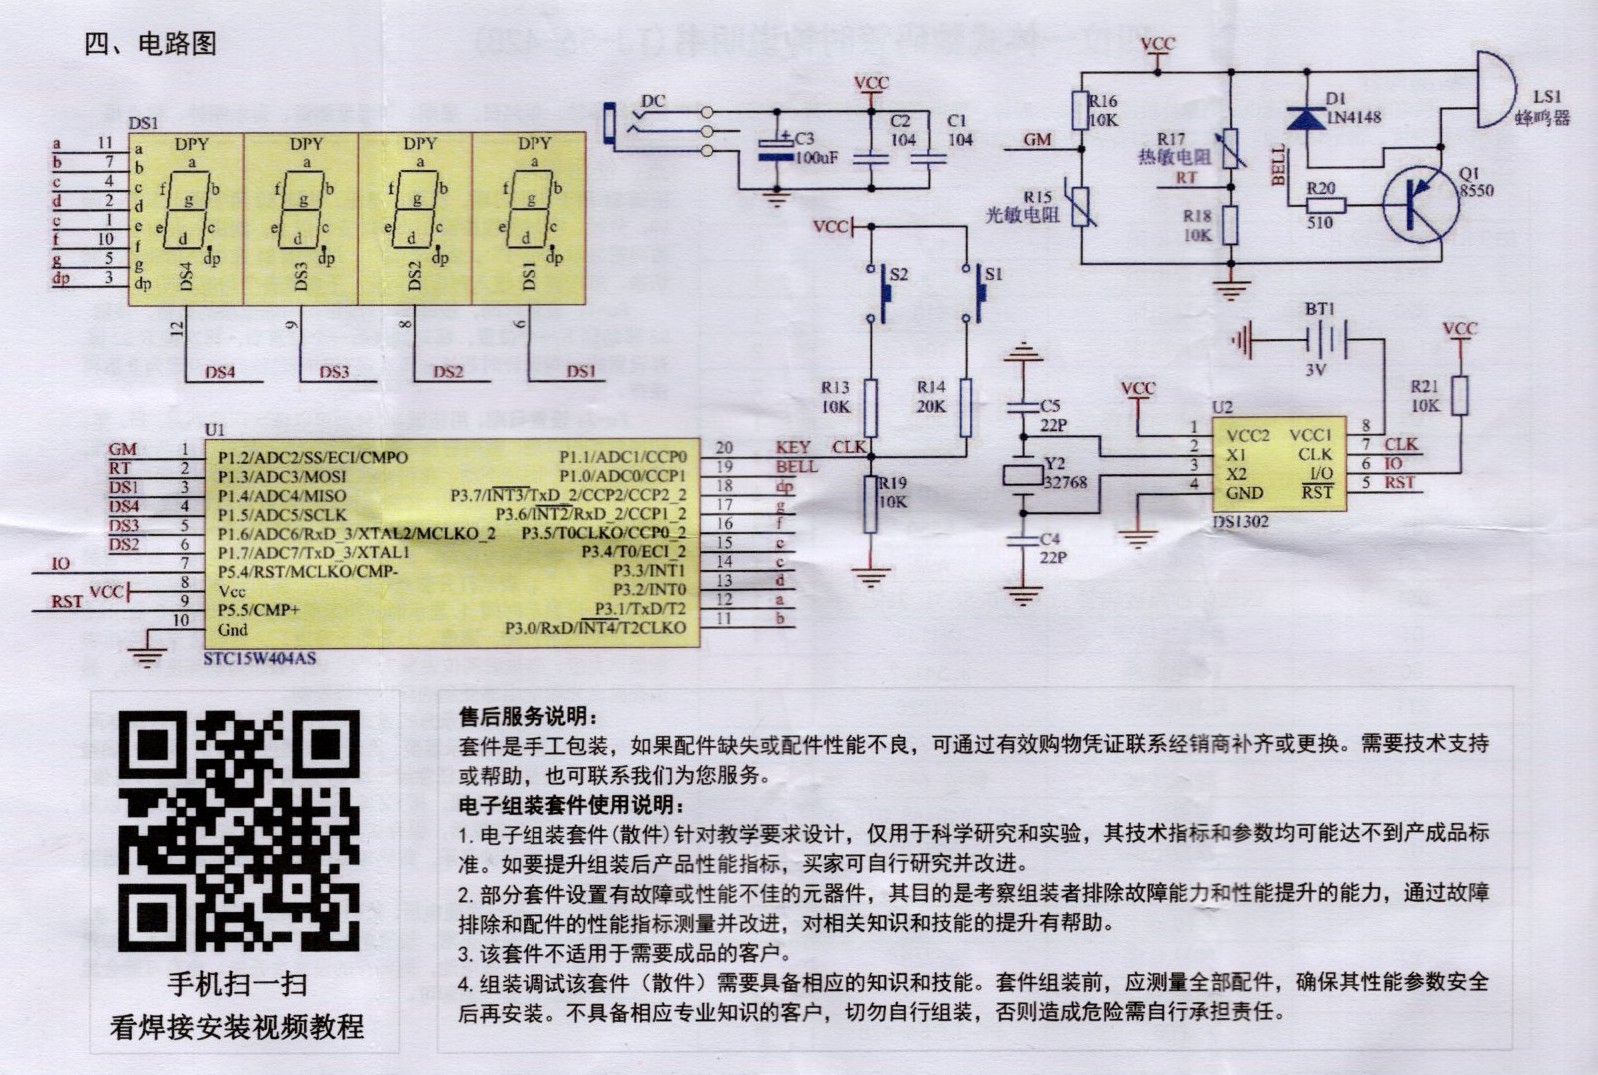
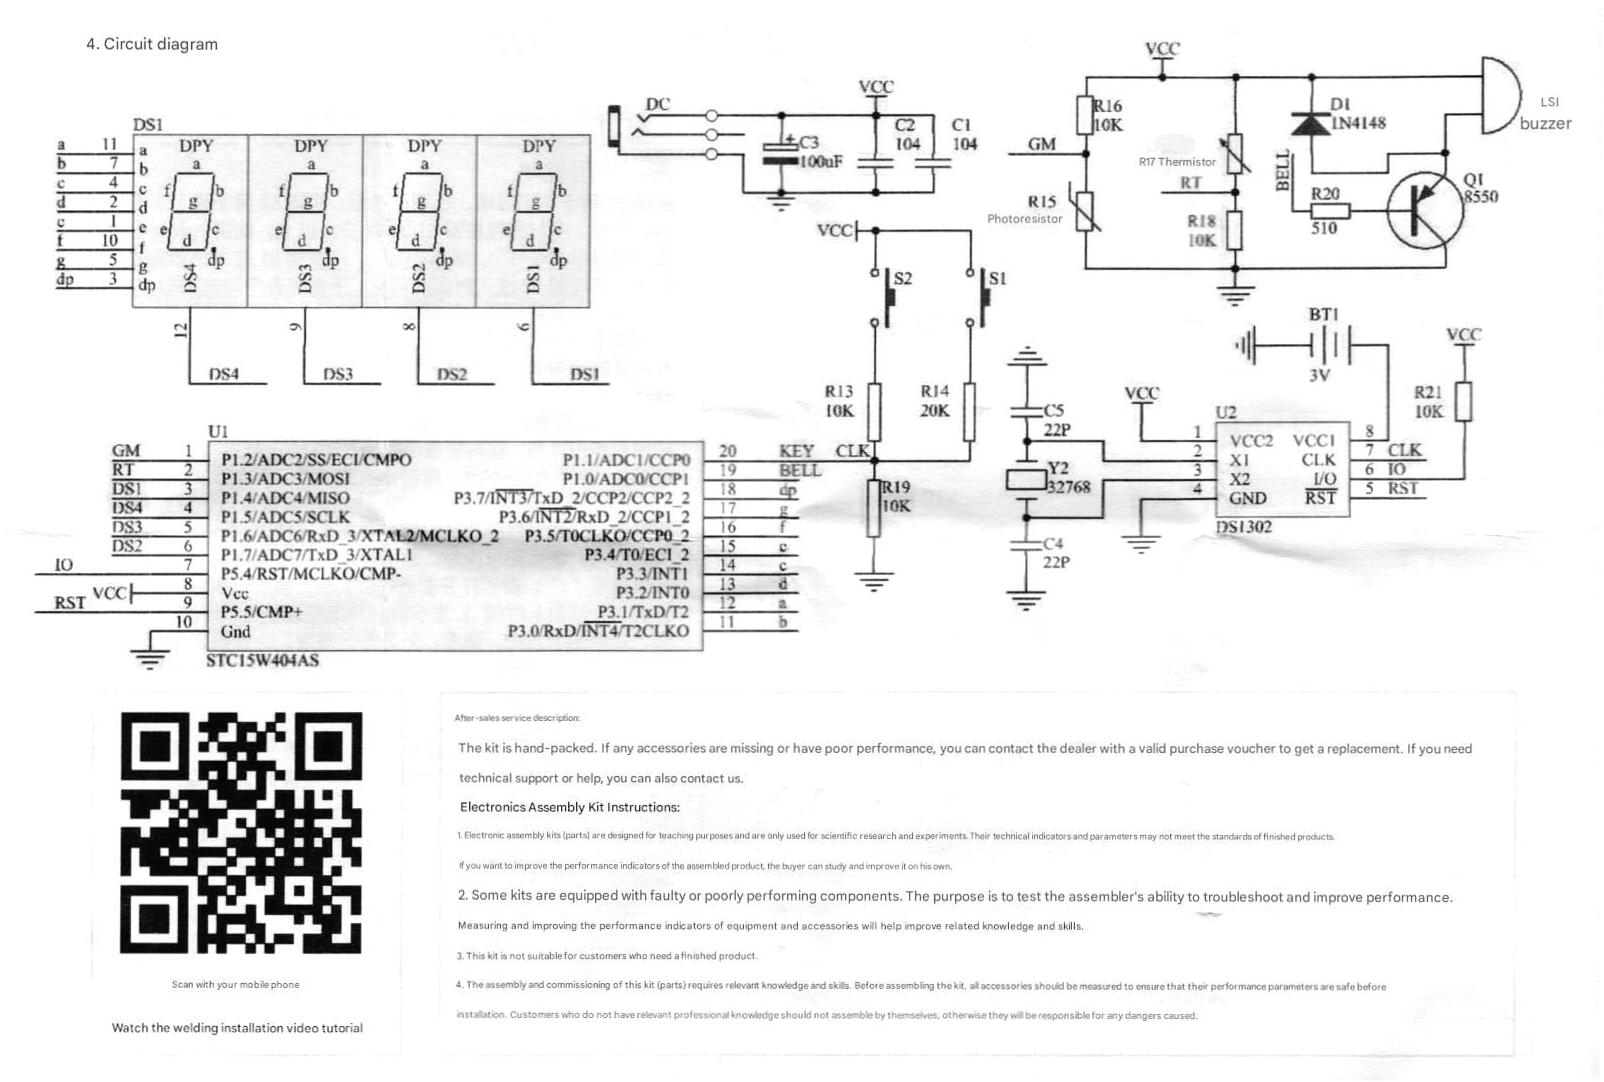
4. Circuit diagram
After-sales service description:
The kit is hand-packed. If any accessories are missing or have poor performance, you can contact the dealer with a valid purchase voucher to get a replacement. If you need technical support or help, you can also contact us.
Electronics Assembly Kit Instructions:
- Electronic assembly kits (parts) are designed for teaching purposes and are only used for scientific research and experiments. Their technical indicators and parameters may not meet the standards of finished products. If you want to improve the performance indicators of the assembled product, the buyer can study and improve it on his own.
- Some kits are equipped with faulty or poorly performing components. The purpose is to test the assembler's ability to troubleshoot and improve performance. Measuring and improving the performance indicators of equipment and accessories will help improve related knowledge and skills.
- This kit is not suitable for customers who need a finished product.
- The assembly and commissioning of this kit (parts) requires relevant knowledge and skills. Before assembling the kit, all accessories should be measured to ensure that their performance parameters are safe before installation. Customers who do not have relevant professional knowledge should not assemble by themselves, otherwise they will be responsible for any dangers caused.
Watch the welding installation video tutorial (in Chinese).
5. Documentation scans
These are the scans of the documentation which arrived with the kit.
These are the scans after they have been translated from Simplified Chinese into English by Google Translate.


